> For the complete documentation index, see [llms.txt](https://codifi-fdm.gitbook.io/codifi-docs/llms.txt). Markdown versions of documentation pages are available by appending `.md` to page URLs; this page is available as [Markdown](https://codifi-fdm.gitbook.io/codifi-docs/getting-started/inviting-users-to-codifi.md).

# Inviting Users to Codifi

Codifi uses a role-based invitation system. Organization administrators can invite new users, assign roles, and manage access from the **User Management** page.

## Prerequisites

Before inviting users, ensure you have the appropriate permissions:

* You must have the **User Management: Invite User** permission
* Only users with **Codifi Admin**, **Super Admin**, or **User Admin** roles can invite others

## How to Invite a New User

### Step 1: Open the Invite Modal

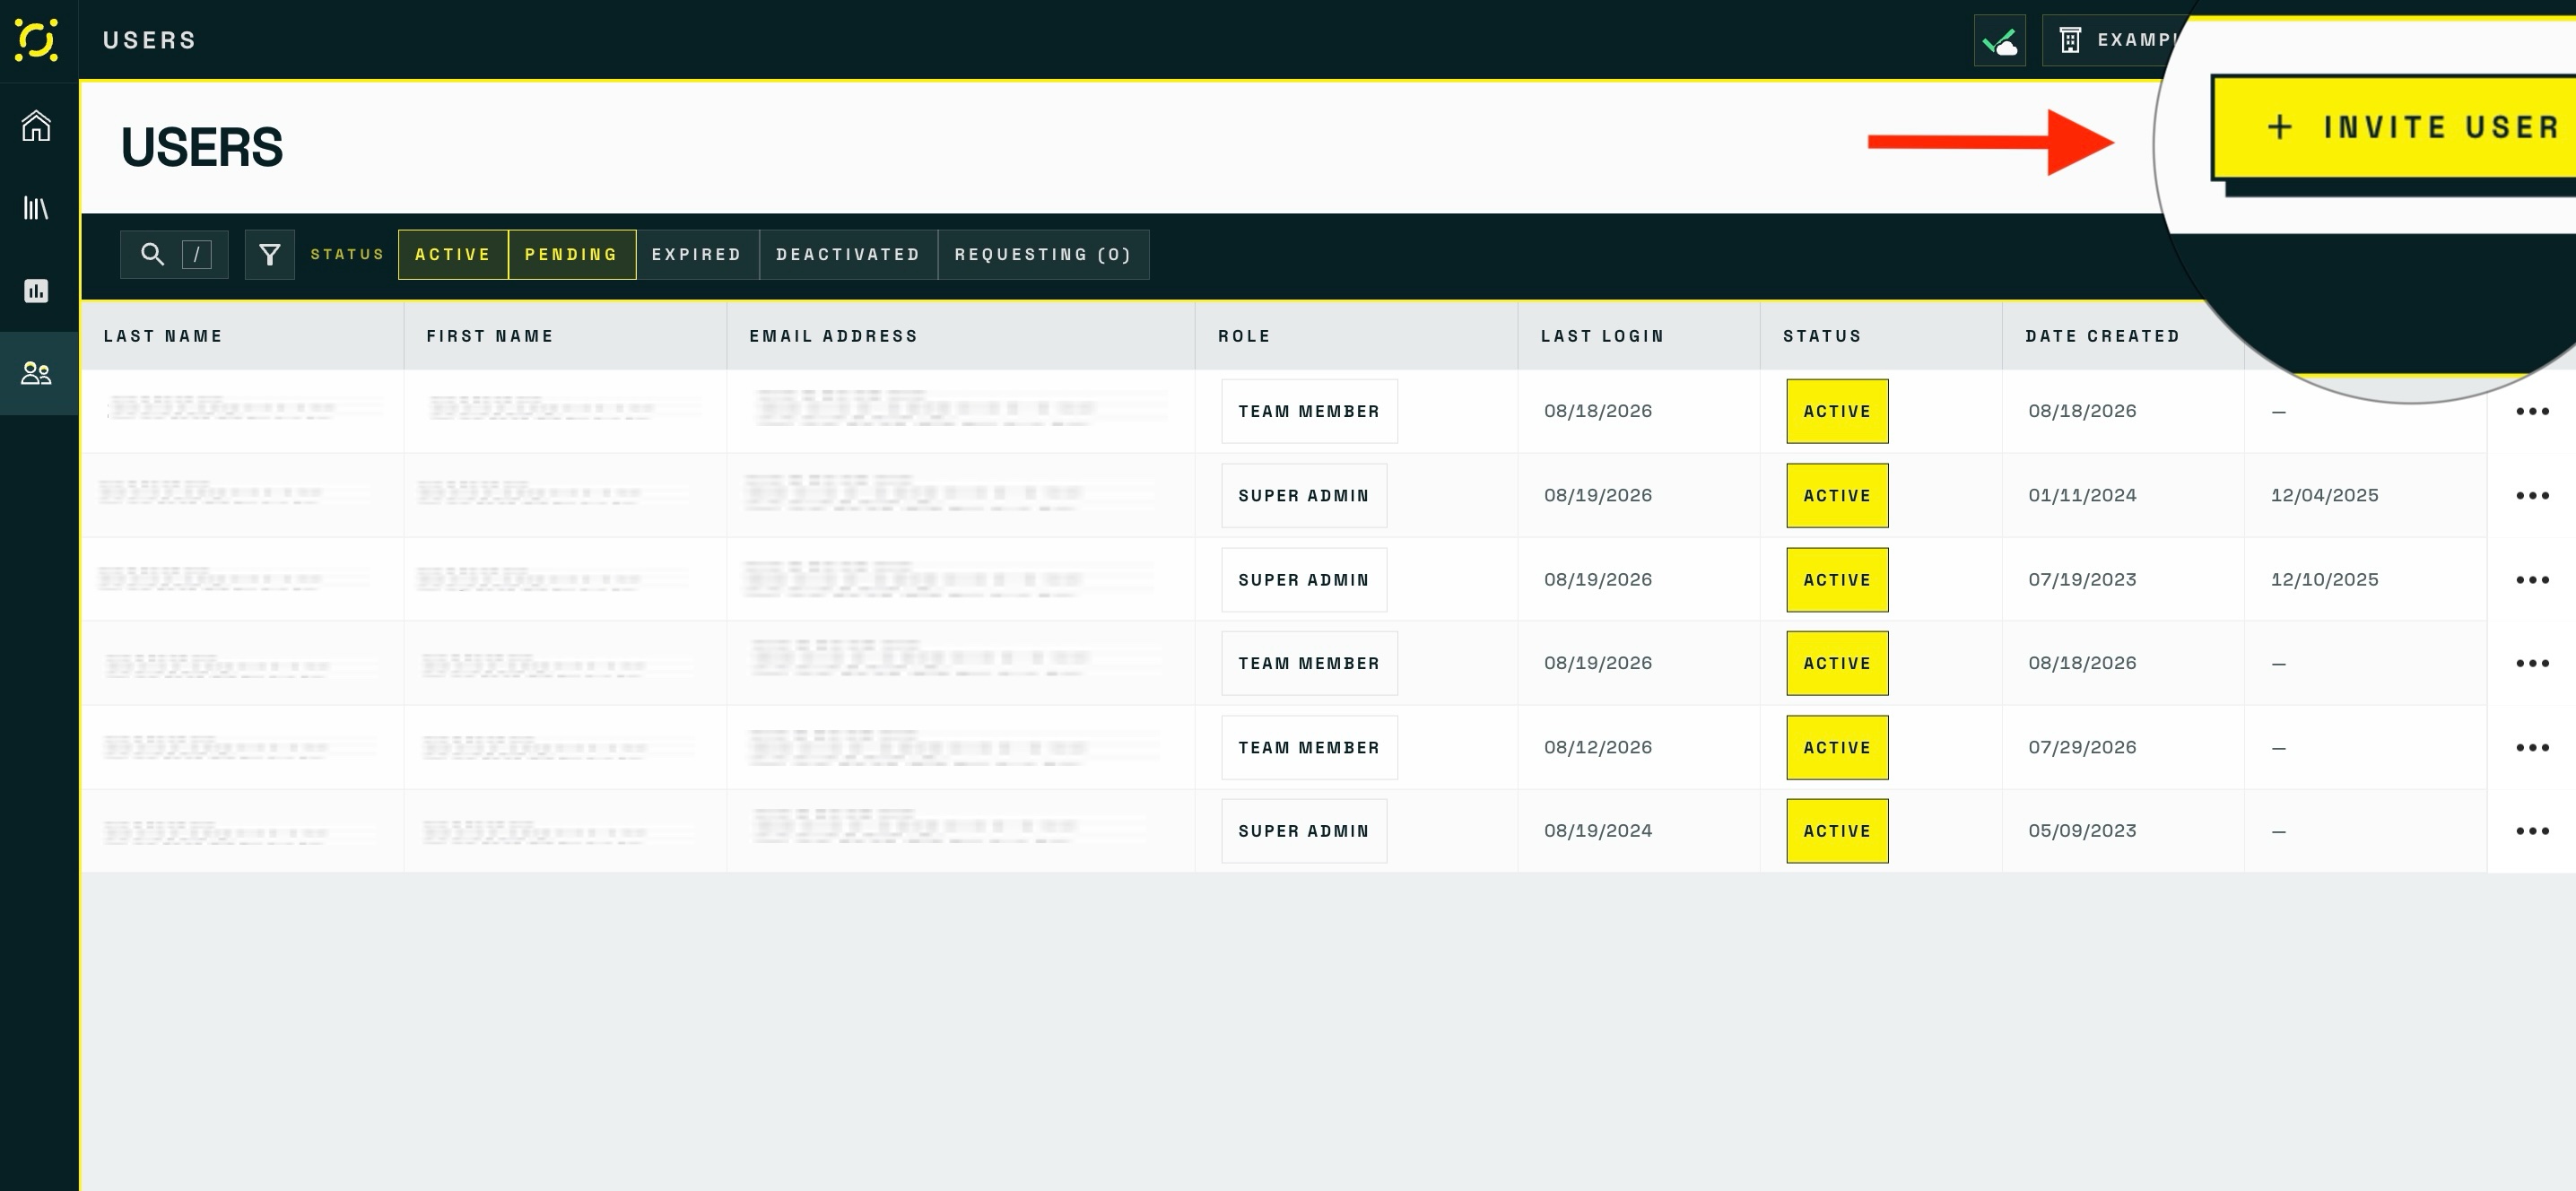
Navigate to **User Management** (`/usermanagement`) and click the **Invite User** button in the toolbar above the users grid.

<figure><img src="https://3544178300-files.gitbook.io/~/files/v0/b/gitbook-x-prod.appspot.com/o/spaces%2FJ8P3pqhxdFwQkIOjOUut%2Fuploads%2Fgit-blob-67a0dbc7723c671792c870502e00f617d3f4b001%2Finvite-user-management-button.jpg?alt=media" alt="The User Management page with the Invite User button highlighted in the toolbar above the users grid"><figcaption><p><strong>Invite User</strong> sits in the toolbar above the users grid.</p></figcaption></figure>

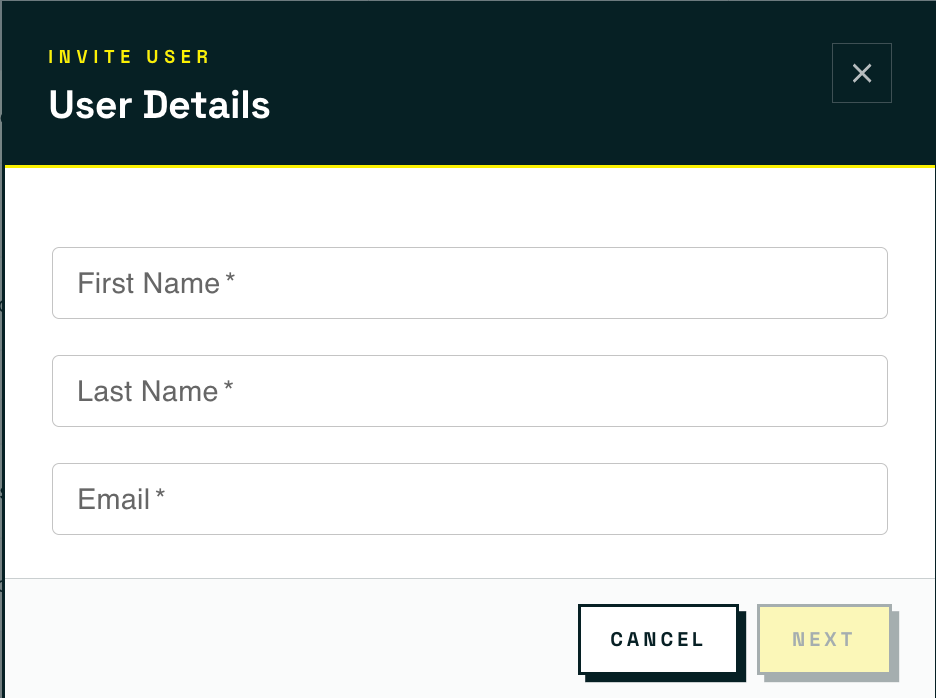
### Step 2: Enter User Details

Fill in the required fields:

| Field          | Requirements                                    |
| -------------- | ----------------------------------------------- |
| **First Name** | Required. Maximum 100 characters. Letters only. |
| **Last Name**  | Required. Maximum 100 characters. Letters only. |
| **Email**      | Required. Must be a valid email address.        |

Click **Next** to proceed to role assignment.

<figure><img src="https://3544178300-files.gitbook.io/~/files/v0/b/gitbook-x-prod.appspot.com/o/spaces%2FJ8P3pqhxdFwQkIOjOUut%2Fuploads%2Fgit-blob-6c04cecee917c14766da3b4f6d7338df627243f2%2Finvite-user-modal-step-one.png?alt=media" alt="Step one of the Invite User modal showing the First Name, Last Name, and Email fields with Cancel and Next buttons"><figcaption><p>Step one of the Invite User modal. <strong>Next</strong> moves you on to role assignment.</p></figcaption></figure>

### Step 3: Assign Roles

Select one or more roles for the user. The heading reads **"Roles"** with the subtitle **"Select all that apply."**

| Role              | Description                                                                     |
| ----------------- | ------------------------------------------------------------------------------- |
| **Super Admin**   | Full system access. When selected, all other roles (except Guest) are disabled. |
| **Company Admin** | Company-level administrative access.                                            |
| **User Admin**    | Can invite, edit, and deactivate users.                                         |
| **Composer**      | Access to Composition and form building tools.                                  |
| **Data Admin**    | Can manage Project data, Records, and exports.                                  |
| **Project Admin** | Can configure Projects, members, and map settings.                              |
| **Team Member**   | Standard user role. This is the **default selection** for new invitations.      |
| **Guest**         | Limited, read-only access. When selected, all other roles are disabled.         |

**Role visibility note:** The roles you can assign depend on your own role:

* **Codifi Admins** see all roles
* **User Admins** cannot assign the Guest role
* **Other roles** cannot see Super Admin, Composer, or Company Admin

### Step 4: Send the Invitation

Click **Invite** to send the invitation. A confirmation toast will appear:

> *"{First Name} {Last Name} was invited."*

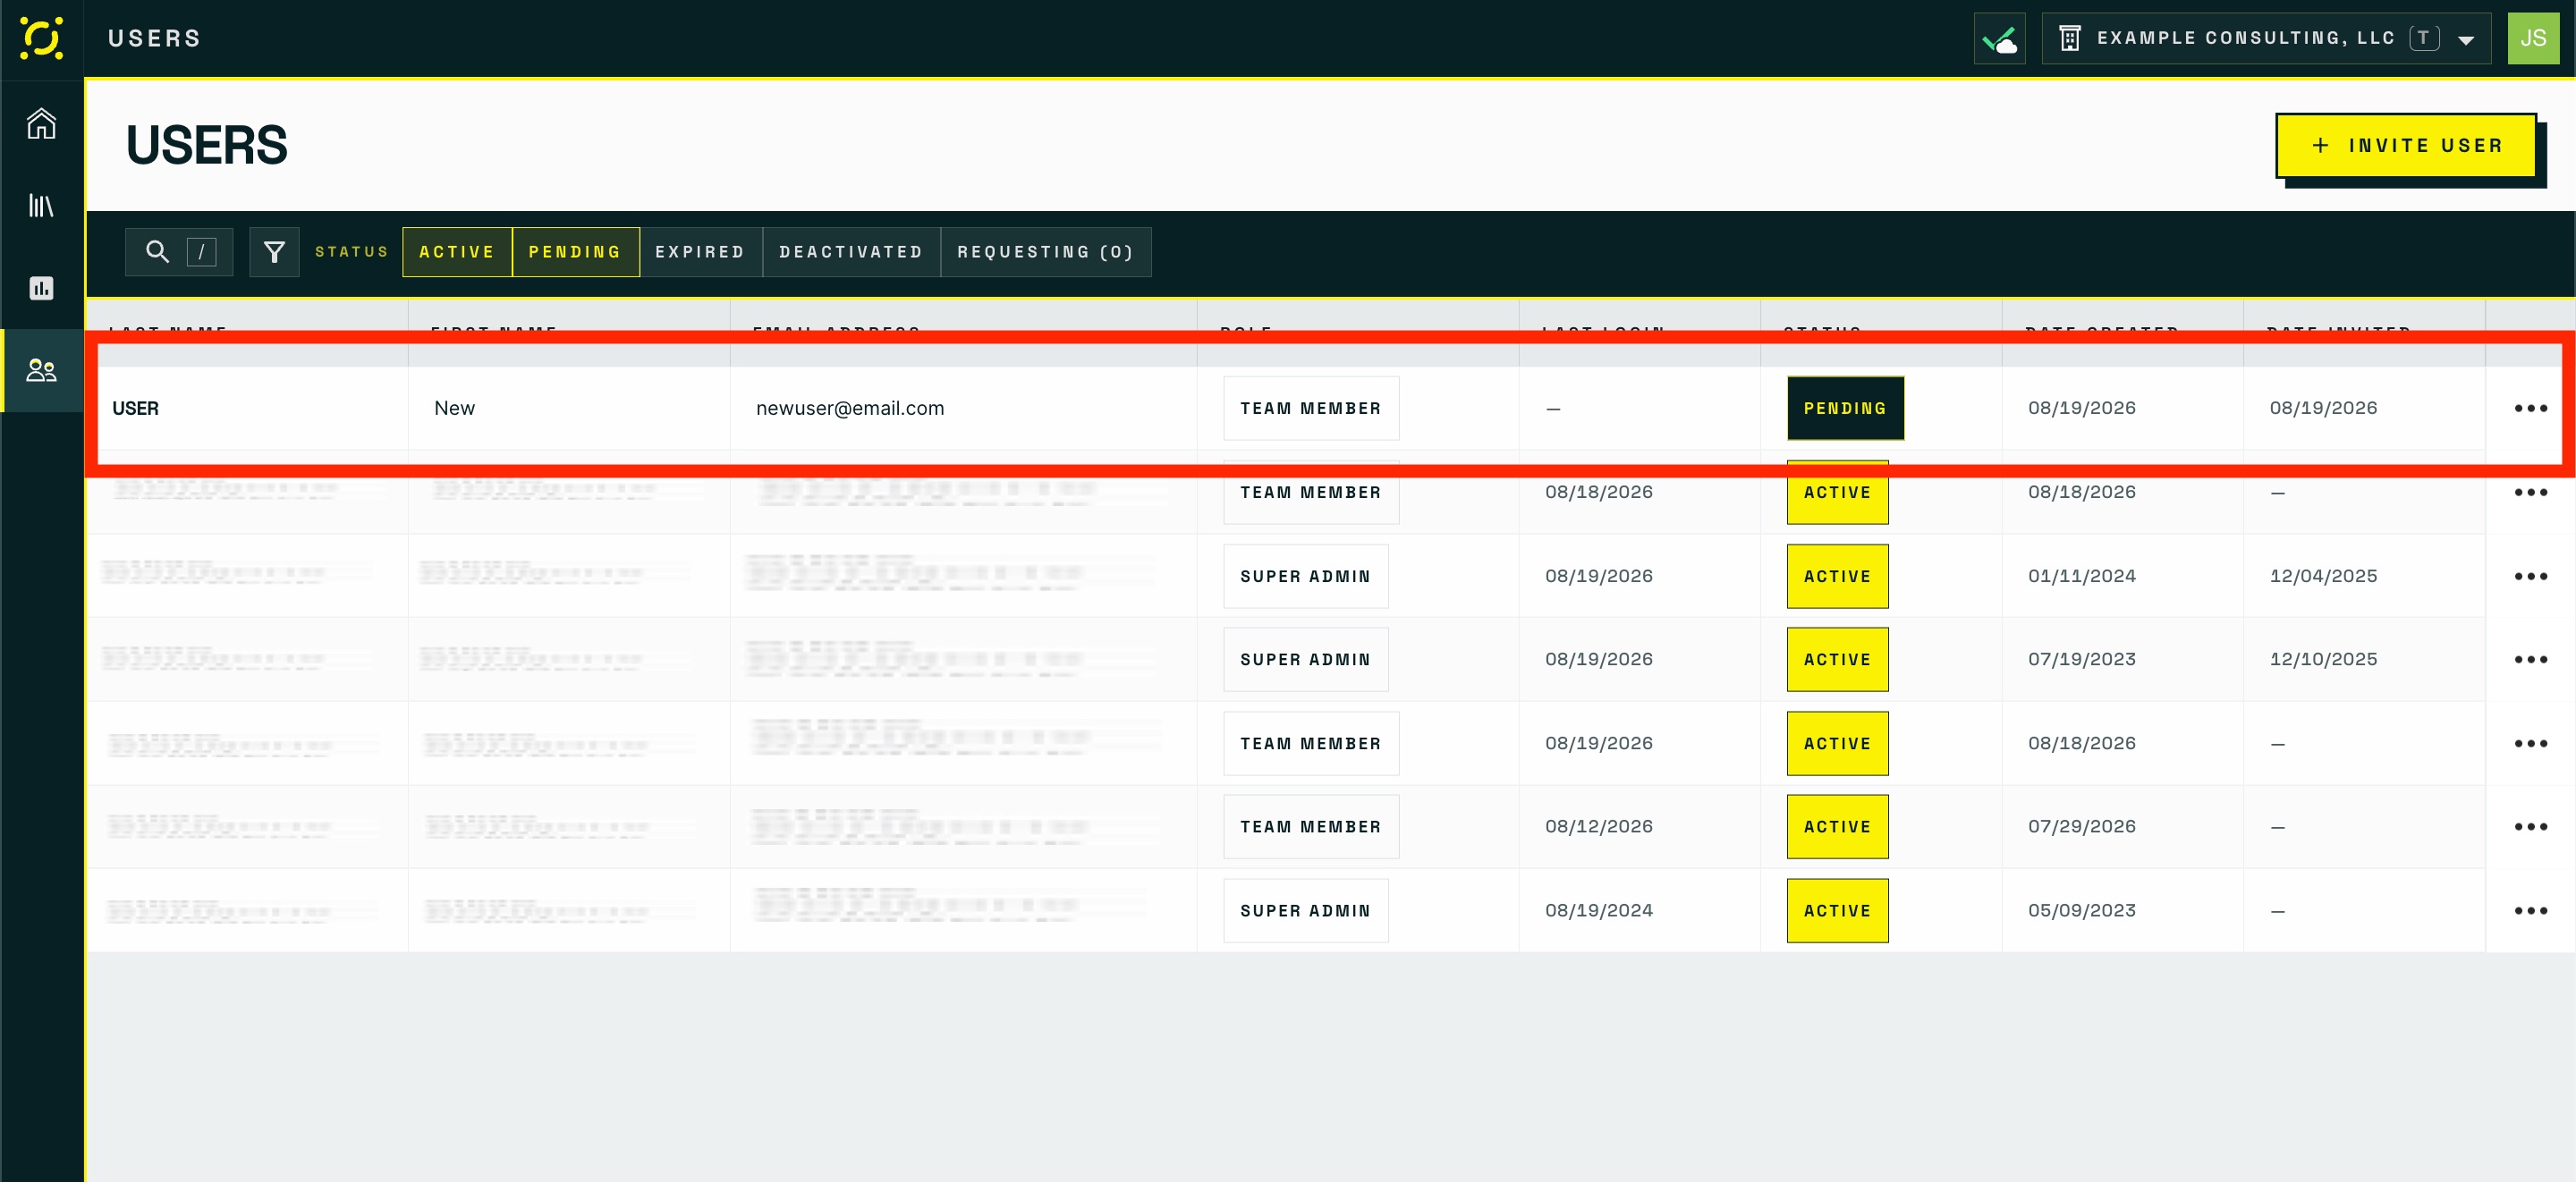
The invited user will appear in the users grid with a **Pending** status, and their row will briefly highlight in green.

<figure><img src="https://3544178300-files.gitbook.io/~/files/v0/b/gitbook-x-prod.appspot.com/o/spaces%2FJ8P3pqhxdFwQkIOjOUut%2Fuploads%2Fgit-blob-b397e8f0bef2e2202dd26c4f450b35455bd57d70%2Finvite-users-grid-pending-row.jpg?alt=media" alt="The users grid with a newly invited row highlighted in green and showing Pending status"><figcaption><p>The new user lands in the grid with a <strong>Pending</strong> status; the row highlights green briefly.</p></figcaption></figure>

## What Happens After You Invite Someone

1. The invited user receives an **email** with a secure invitation link
2. They click the link, which takes them to a **verification page**
3. If they are new to Codifi, they **set a password** to activate their account
4. If they already have a Codifi account on another tenant, they can activate immediately without setting a new password
5. Once activated, their status changes from **Pending** to **Active**

If the invitation link expires, the user can request access again, which places them in the **Requested Users** queue.

## Re-Inviting Users

You can re-invite users whose invitations have **expired** or who have been **deactivated**:

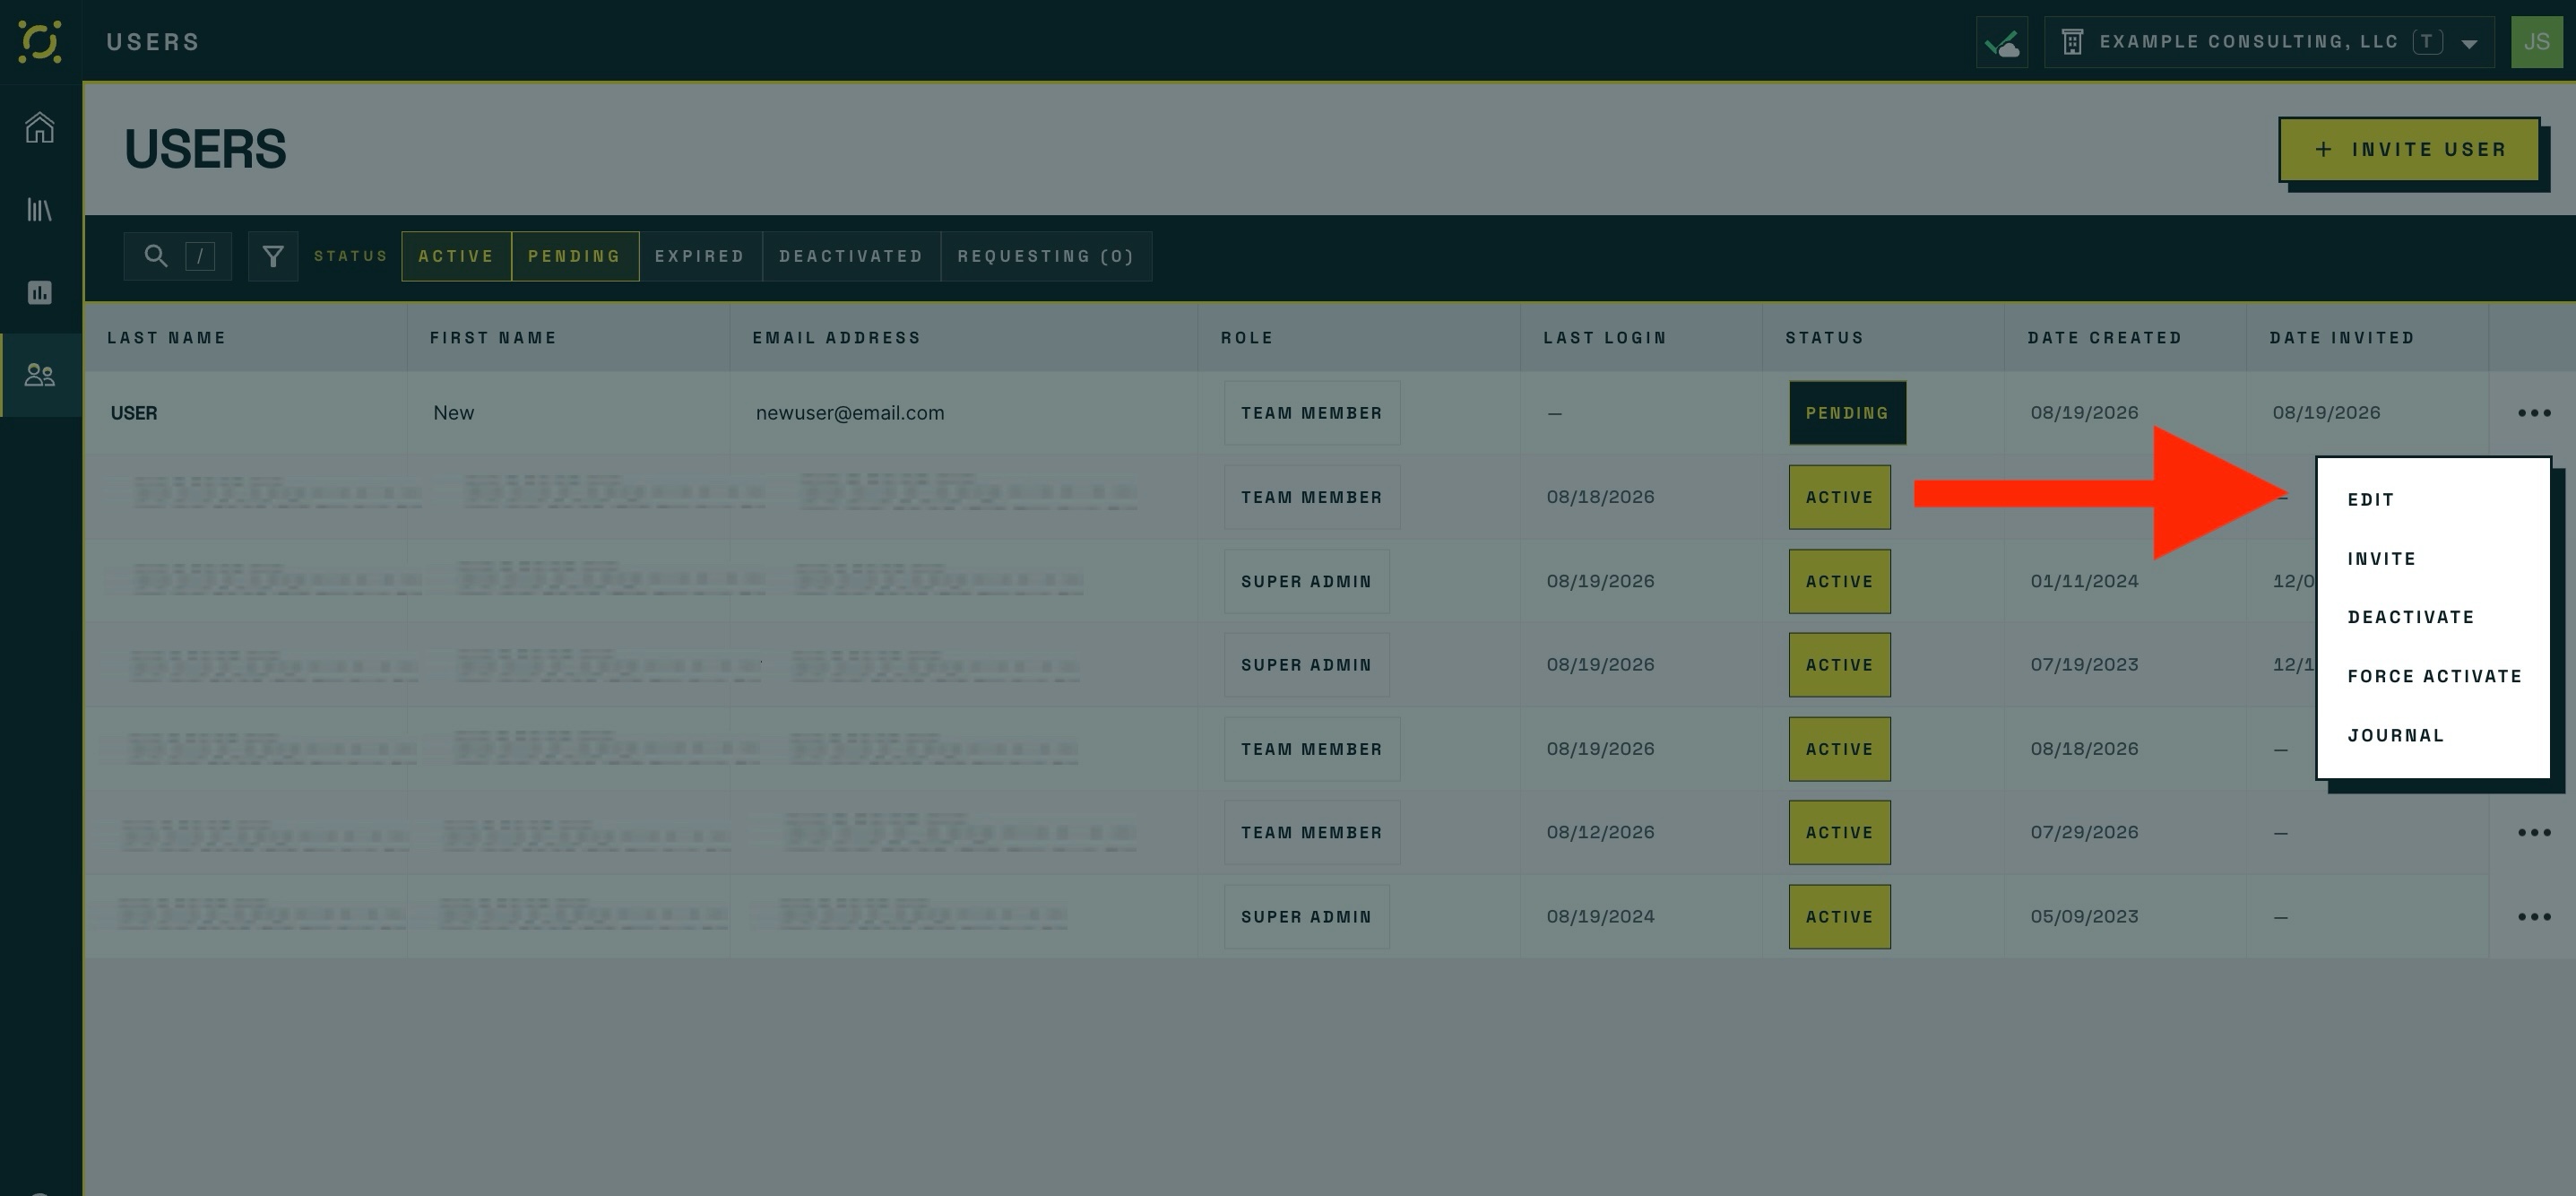
1. Find the user in the users grid
2. Click the **actions menu** (three dots) on their row
3. Select **Invite**

This sends a fresh invitation email. The user's status will return to **Pending**.

<figure><img src="https://3544178300-files.gitbook.io/~/files/v0/b/gitbook-x-prod.appspot.com/o/spaces%2FJ8P3pqhxdFwQkIOjOUut%2Fuploads%2Fgit-blob-4db4fa119968cb258069b298ed58c00aa1263d7e%2Finvite-row-action-menu.jpg?alt=media" alt="The three-dot action menu open on a user row, showing the Invite option"><figcaption><p>The row action menu. <strong>Invite</strong> re-sends the invitation to an expired or deactivated user.</p></figcaption></figure>

## Inviting Requested Users

When someone requests access to your organization, they appear in the **Requested Users** section at the top of the User Management page.

**Single request:**

> *"{email} is requesting access"*

**Multiple requests:**

> *"{email} and {count} other person are requesting access"* — with a **View All** button to expand the full list.

For each request, you can:

* **Invite** — Opens the invite modal pre-filled with their details so you can assign roles and complete the invitation
* **Ignore** — Removes the request from the list

> **Screenshot placeholder:** *The Requested Users section showing a pending access request with "Invite" and "Ignore" action buttons.*

## User Statuses

| Status          | Description                                      | Available Actions |
| --------------- | ------------------------------------------------ | ----------------- |
| **Active**      | User has accepted invitation and can log in      | Edit, Deactivate  |
| **Pending**     | Invitation sent, waiting for user to accept      | Edit, Re-invite   |
| **Expired**     | Invitation link has expired                      | Edit, Re-invite   |
| **Deactivated** | User access has been revoked by an administrator | Edit, Re-invite   |

## Troubleshooting

| Issue                                     | Solution                                                                                                   |
| ----------------------------------------- | ---------------------------------------------------------------------------------------------------------- |
| "Invite User" button is not visible       | You may not have the **User Management: Invite User** permission. Contact your administrator.              |
| User did not receive the invitation email | Check the email address for typos. You can re-invite the user from the actions menu.                       |
| Invitation link expired                   | Re-invite the user from the actions menu. A new invitation email will be sent.                             |
| Cannot assign certain roles               | Your own role determines which roles you can assign. Contact a Codifi Admin for elevated role assignments. |
| Email already in use error                | The email address is already associated with another Codifi account. Use a different email.                |