> For the complete documentation index, see [llms.txt](https://codifi-fdm.gitbook.io/codifi-docs/llms.txt). Markdown versions of documentation pages are available by appending `.md` to page URLs; this page is available as [Markdown](https://codifi-fdm.gitbook.io/codifi-docs/mobile-app/capturing-photos-and-media/photos-on-the-map.md).

# Photos on the Map

Geotagged photos in Codifi show up as **camera markers on the map**. They're queryable, filterable, and let you preview without opening the source Record — useful when re-surveying an area or checking prior coverage.

This page covers the Photos layer specifically. For the broader photo capture workflow, see [Capturing Photos & Media](/codifi-docs/mobile-app/capturing-photos-and-media.md).

***

## How to show photos on the map

1. Open the **map view**.
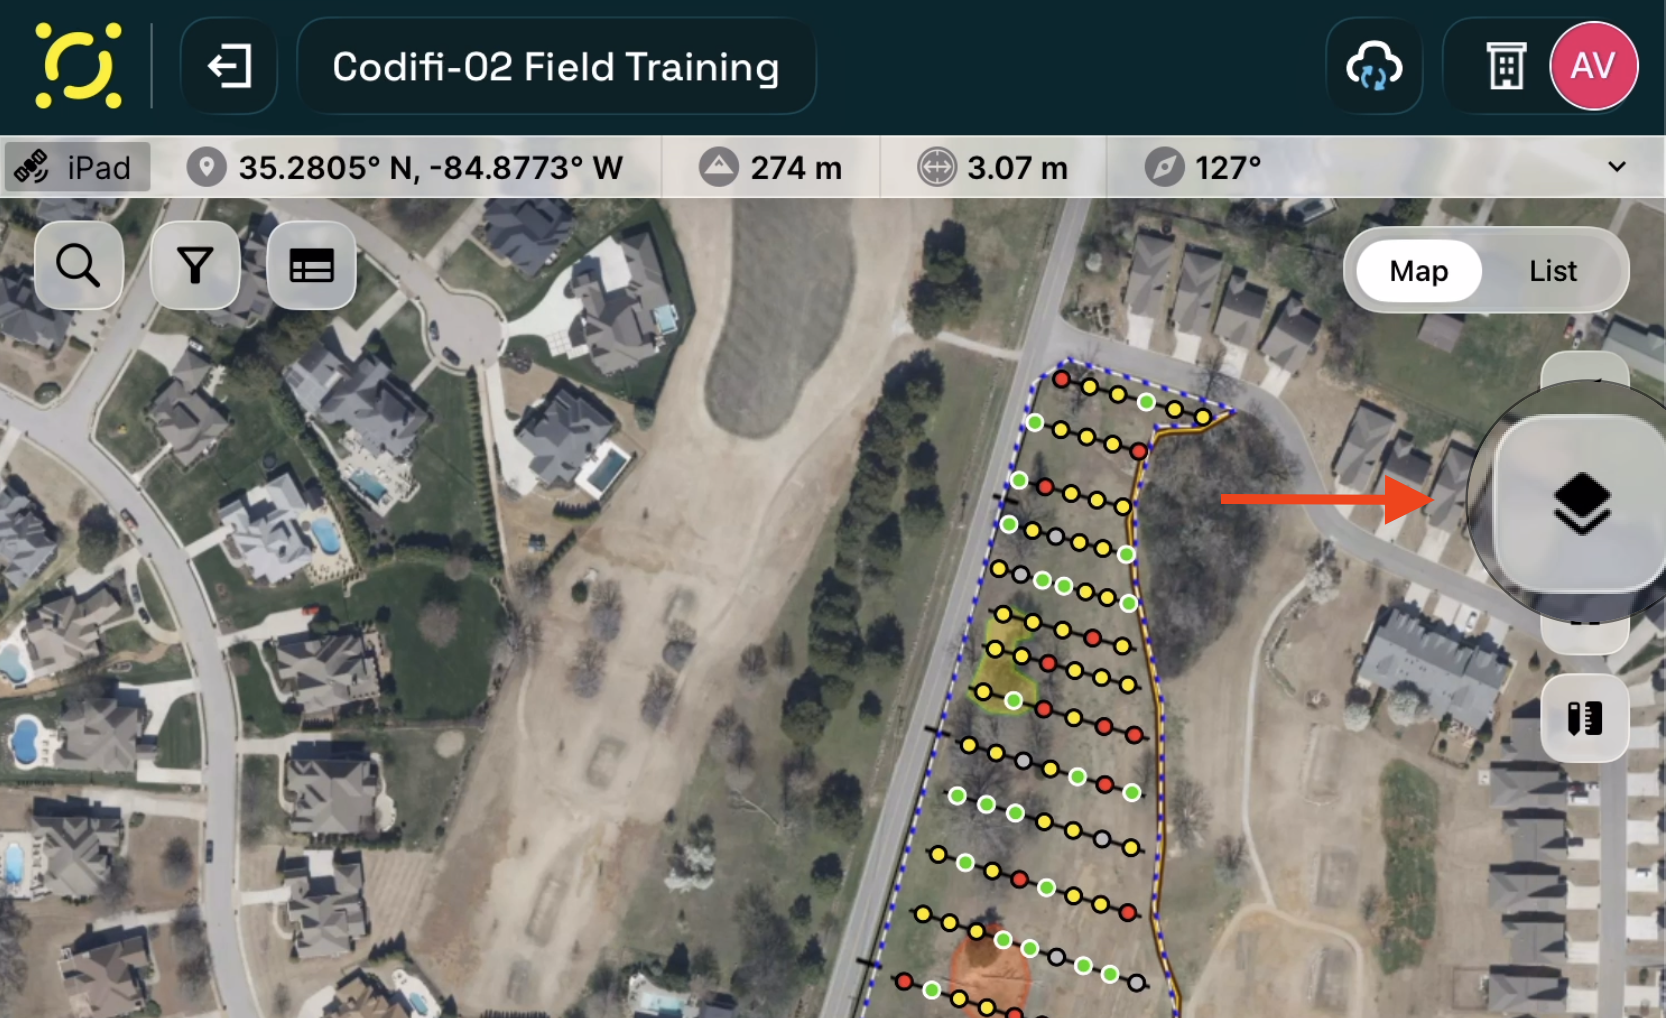
2. Tap the **map layers** control on the right edge of the map.
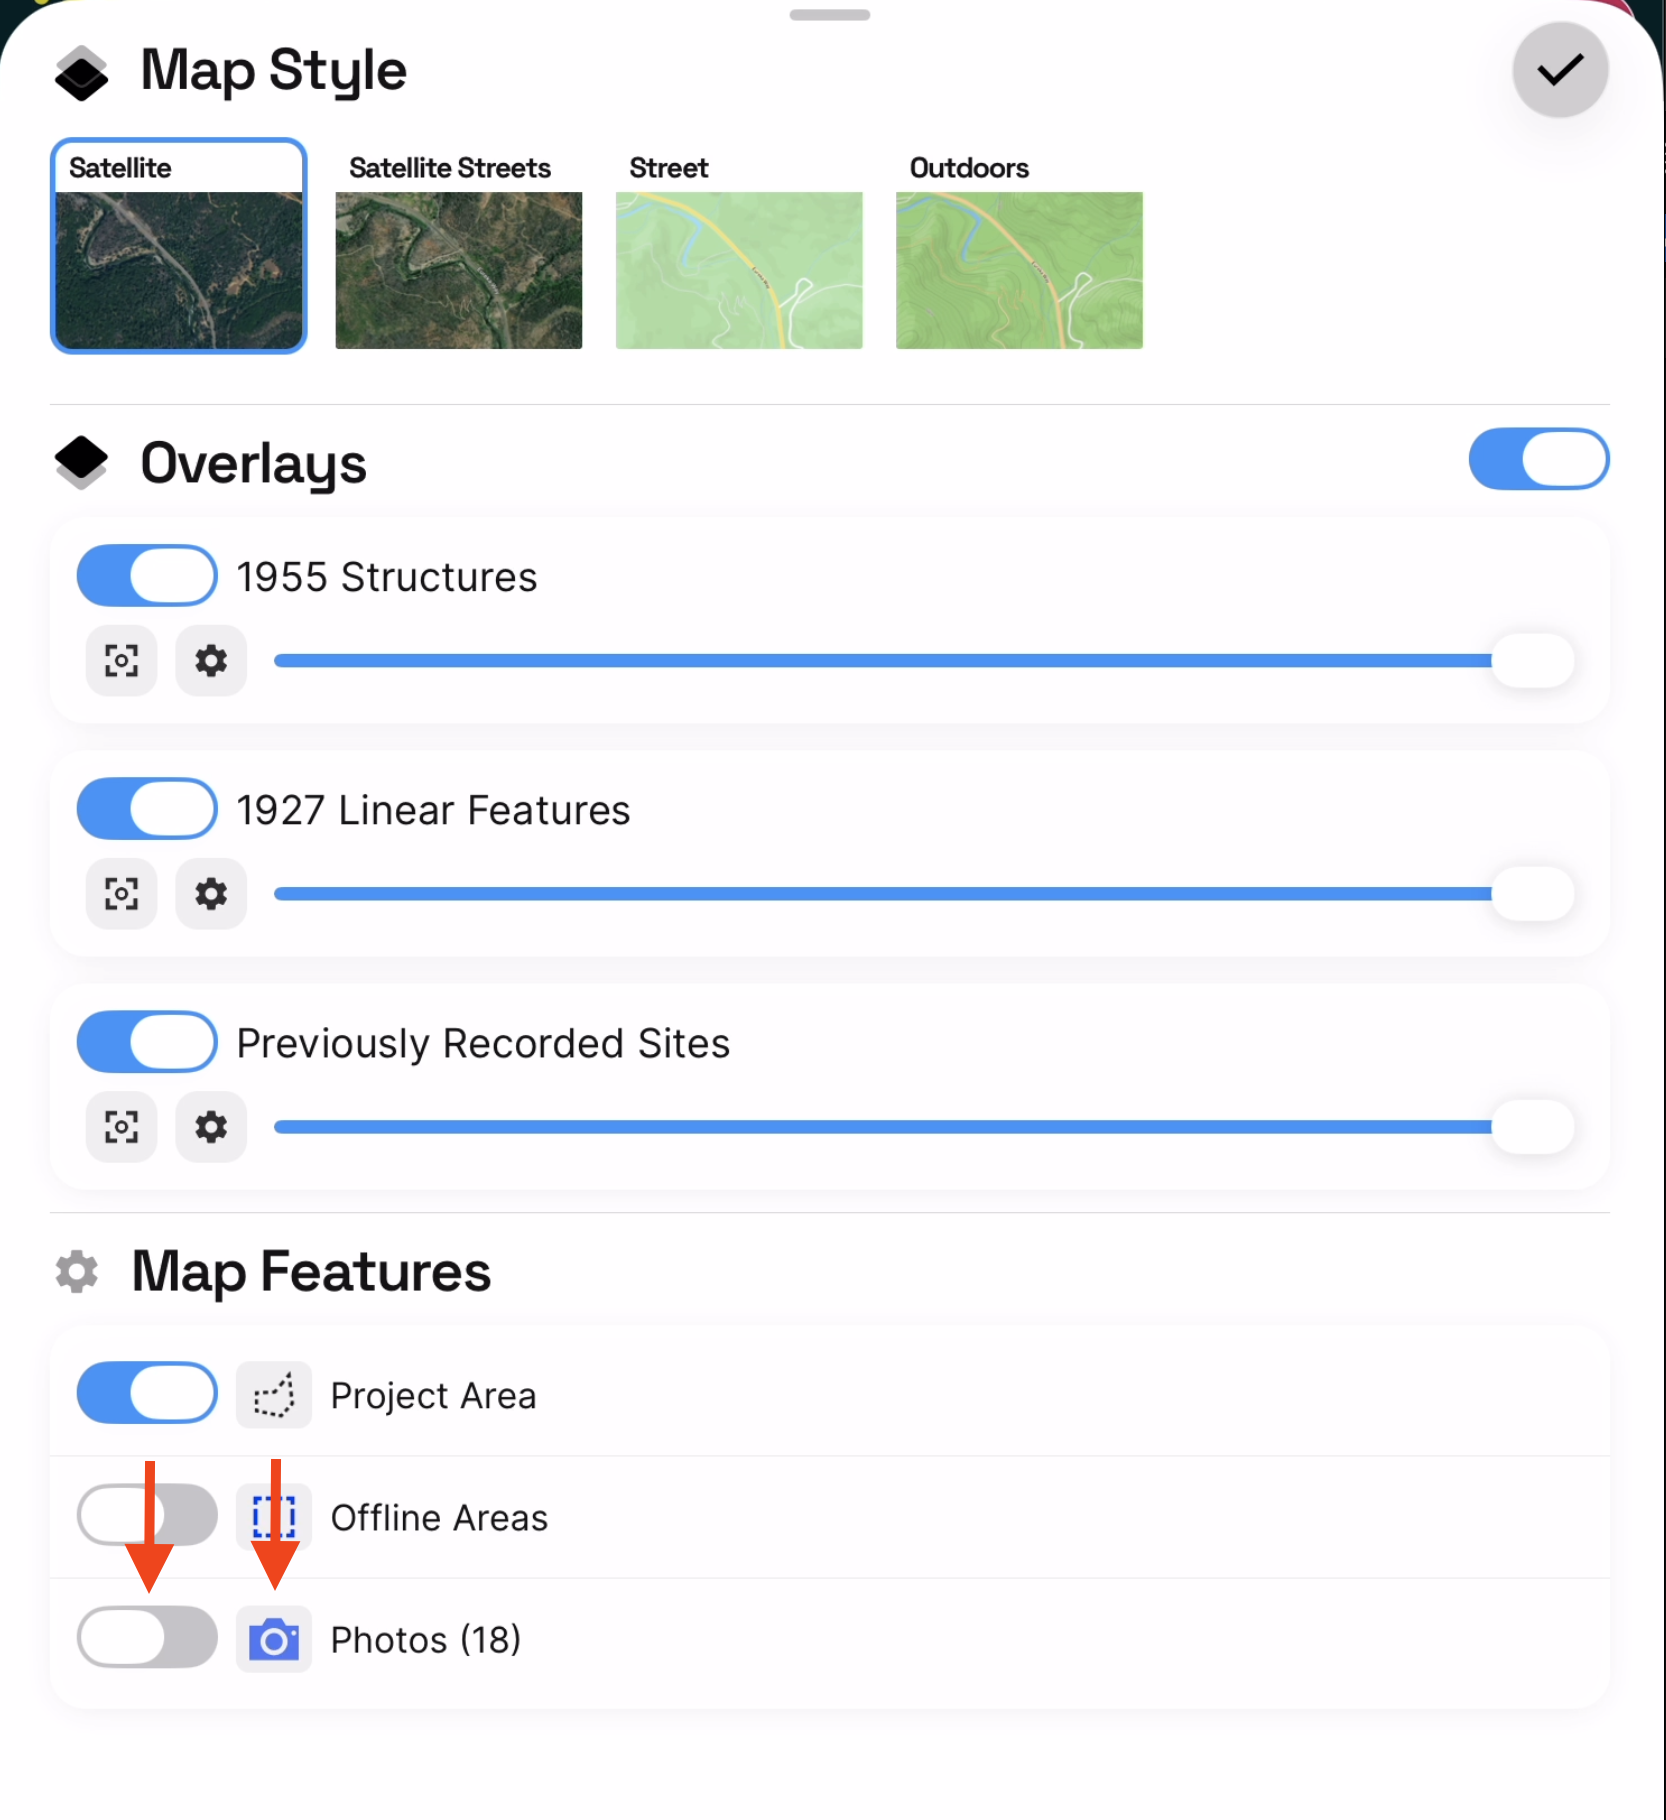
3. In the **Map Style** sheet that opens, scroll to **Map Features** and toggle **Photos** on. The count next to the toggle shows how many geotagged photos the Project has.

<figure><img src="https://3544178300-files.gitbook.io/~/files/v0/b/gitbook-x-prod.appspot.com/o/spaces%2FJ8P3pqhxdFwQkIOjOUut%2Fuploads%2Fgit-blob-2fad29c0ef1223accf43070a0a05185f984e2750%2Fphotos-layer-layers-button.png?alt=media" alt="The map screen with the layers button highlighted on the right edge"><figcaption><p>The map layers control on the right edge of the map.</p></figcaption></figure>

<figure><img src="https://3544178300-files.gitbook.io/~/files/v0/b/gitbook-x-prod.appspot.com/o/spaces%2FJ8P3pqhxdFwQkIOjOUut%2Fuploads%2Fgit-blob-ac722b0a7028adc81f1d28c4c3ac40f8912c6226%2Fphotos-layer-map-style-toggle.png?alt=media" alt="The Map Style sheet with the Photos toggle highlighted under Map Features"><figcaption><p>Toggle <strong>Photos</strong> on under Map Features. The camera icon next to the toggle zooms the map to the bounds of the Project's photos.</p></figcaption></figure>

Camera markers appear at each photo's geotagged location, pointing in the direction the photo was facing (compass bearing at capture time).

> **Tip:** Tap the **camera icon** next to the Photos toggle to zoom the map to the bounds of all the Project's photos — handy when the photos are somewhere off-screen.

***

## Reading the markers

Each camera marker shows:

* **Position** — where the photo was taken (GPS coordinates from capture).
* **Bearing direction** — which way the camera was pointing, visualized as a small arrow.
* **Viewshed (when configured)** — a translucent cone showing the approximate field of view from camera position out to the focal range.

Multiple photos taken near each other cluster into a single marker; zoom in to disambiguate.

***

## Querying photos on the map

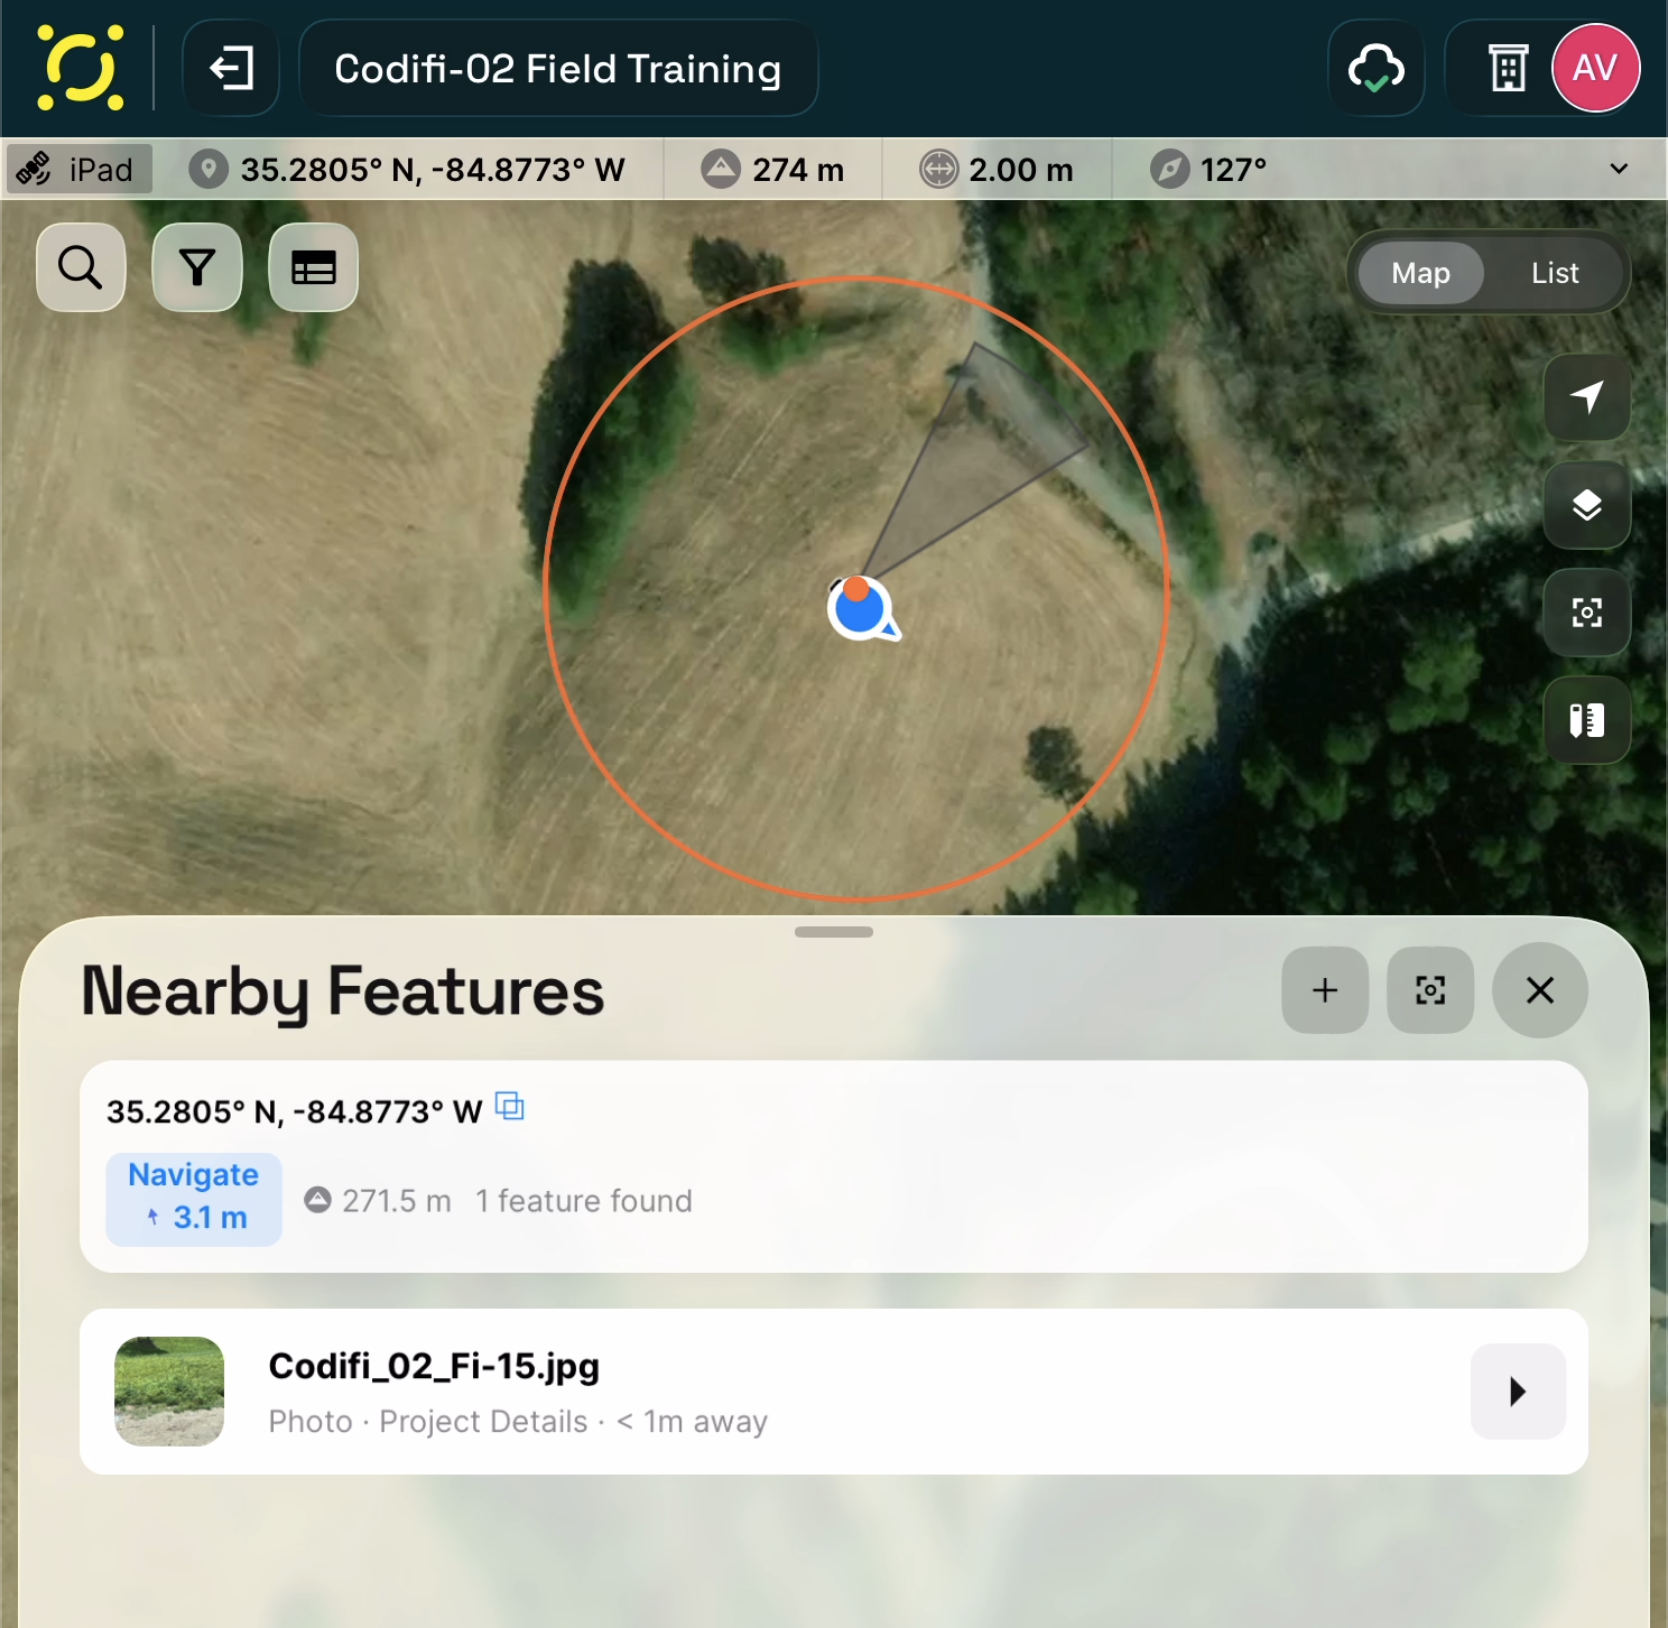
**Long-press** anywhere on the map to query what's at that spot. The **Nearby Features** panel opens, and the orange circle on the map shows the query radius. The panel lists the queried coordinates, a **Navigate** distance chip, and every feature found within the radius — including photos.

<figure><img src="https://3544178300-files.gitbook.io/~/files/v0/b/gitbook-x-prod.appspot.com/o/spaces%2FJ8P3pqhxdFwQkIOjOUut%2Fuploads%2Fgit-blob-672508d6c33610c8b435bb6916a413718e8877e9%2Fnearby-features-long-press.png?alt=media" alt="The Nearby Features panel after a long-press, showing the query radius and a photo in the results list"><figcaption><p>Long-press the map to open <strong>Nearby Features</strong> — one photo found within the query radius.</p></figcaption></figure>

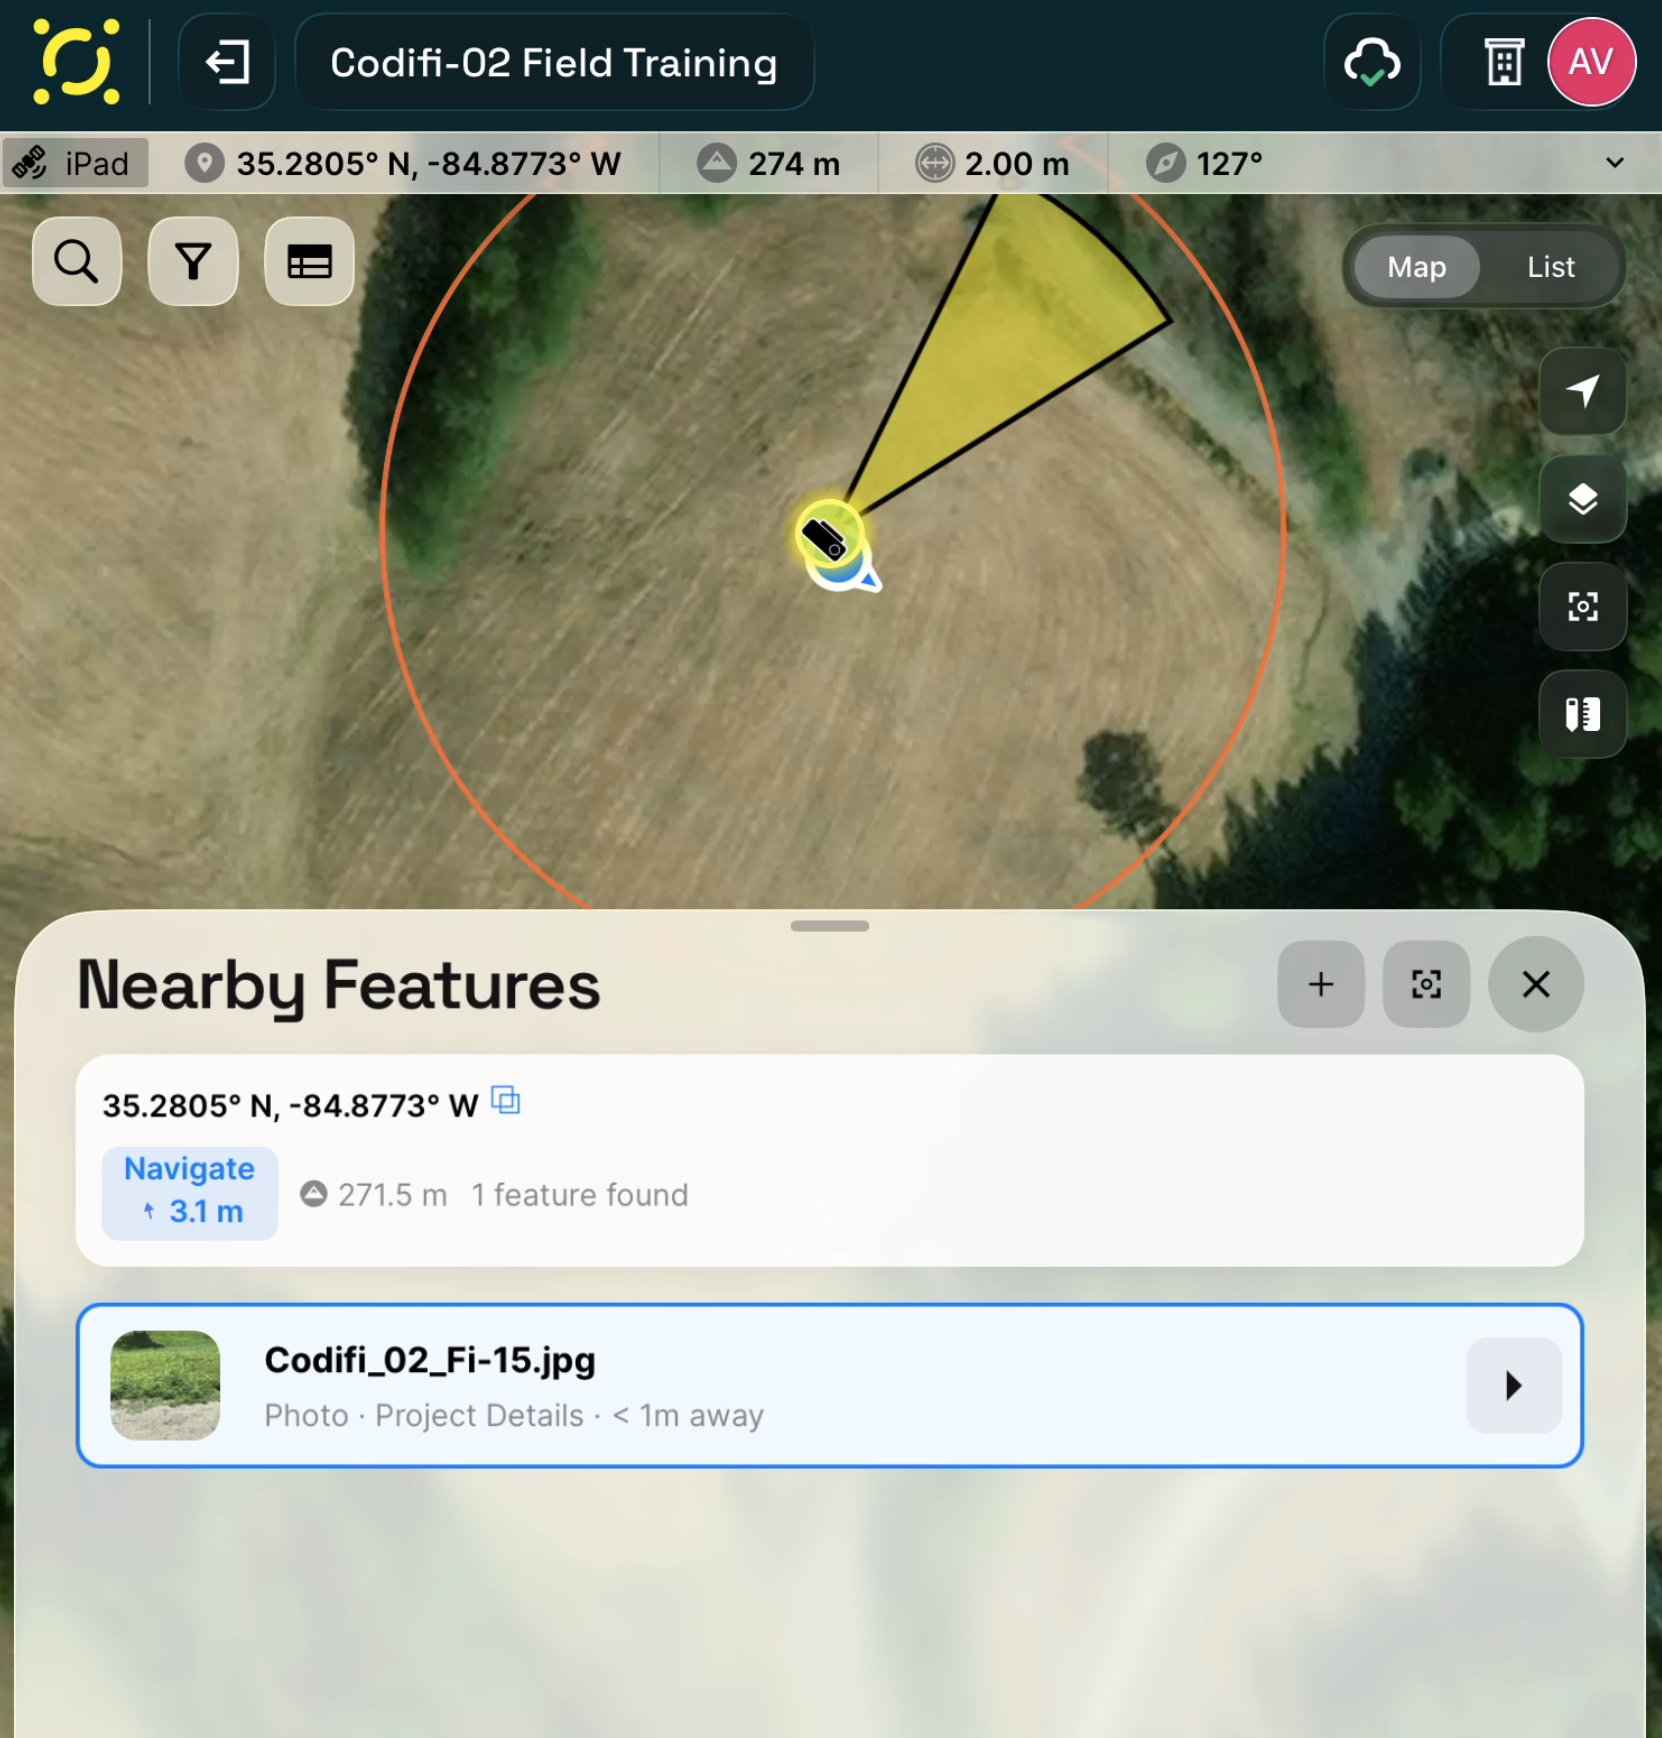
Tap a photo entry in the list to **select it on the map** — the camera marker highlights along with its view cone, so you can see exactly where the photo was taken and which way it was facing. Tap the **thumbnail** for a full-screen preview, all without opening the parent Record.

<figure><img src="https://3544178300-files.gitbook.io/~/files/v0/b/gitbook-x-prod.appspot.com/o/spaces%2FJ8P3pqhxdFwQkIOjOUut%2Fuploads%2Fgit-blob-7deb69f58aea6f10f71002fa82d81b36af6b6a15%2Fnearby-features-photo-selected.png?alt=media" alt="A photo selected in the Nearby Features list, with its camera marker and view cone highlighted on the map"><figcaption><p>Tap an item in the list to highlight it on the map; tap the photo thumbnail for a full-screen preview.</p></figcaption></figure>

Each photo entry in the list shows:

* The **filename**.
* What it's attached to — the **Record name**, or **Project Details** for Project-level photos.
* Its **distance from the query point**.

This is the fastest way to review what was documented at a specific location — much faster than scrolling through a Project's Records looking for the right one.

***

## Common use cases

### Re-surveying a previously documented area

Toggle Photos on. Walk the area with the iPad — markers tell you where prior crews have already documented features. Stop at clusters, preview to confirm what's been covered, capture new Records where gaps exist.

### Confirming photo-to-Record assignment

If you're not sure a photo got attached to the right Record (e.g., two Records were created near each other and you forgot which was selected when you took the photo), long-press the photo's location on the map. Its entry in the Nearby Features list tells you which Record claims it.

### Photo coverage gaps in a Project area

Toggle Photos on, pan over the Project area. Sparse areas suggest under-documentation — useful for QC and for prepping reports.

***

## What if photos aren't showing on the map?

Three usual causes, in order:

1. **The Photos layer isn't on.** Check the layers sheet.
2. **The photos don't have GPS metadata.** Photos taken outside Codifi (imported from the iOS Photos library, sent by a teammate) may not carry the GPS tag we need to plot them. Codifi-taken photos always have it.
3. **The Project's photos haven't synced.** A photo that's still queued for upload on your iPad shows on your map but may not show on a teammate's map until sync completes.

***

## Common questions

### Why are camera markers pointing in different directions?

The arrow on each marker shows the **compass bearing at capture time**. A photo taken facing north and a photo taken facing east will have arrows in different directions, even if taken from the same point.

### Can I edit a photo's location after capture?

Not from the map directly. You'd need to open the photo's metadata from its Record's media gallery. In practice, mis-located photos are rare since Codifi captures GPS at the moment of capture.

### Why is the viewshed only showing on some photos?

Photos taken **within Codifi** include it. Photos taken outside the app — with the built-in iOS Camera or an external camera — likely won't include it, so they plot as a marker without a cone.

### Do Record filters apply to the Photos layer?

No. The Photos layer always shows **all** of the Project's geotagged photos — the filter sheet that scopes Records on the map does not scope the photo markers.

### Does the Photos layer slow down the map?

For Projects with under a few thousand photos, no. Big Projects with tens of thousands of photos may notice a brief delay when the layer is first enabled.

***

## Related

* [**Capturing Photos & Media**](/codifi-docs/mobile-app/capturing-photos-and-media.md) — the full capture workflow that produces the markers shown here.
* [**Media Configuration**](/codifi-docs/mobile-app/mobile-project-settings/media-configuration.md) — how photo filenames are constructed.
* [**Project Details Gallery**](/codifi-docs/mobile-app/capturing-photos-and-media/project-details-gallery.md) — the Project-level photo gallery, which also queryable from the map.
* [**The Map Screen**](/codifi-docs/mobile-app/mapping-locations/understanding-the-map-screen.md) — broader map controls including layer toggles.